
Last updated July 13, 2026
Garage Door Repair Maintenance Checklist for Miami Homeowners
Most garage doors in Miami don’t fail because they’ve been used too hard — they fail because they’ve been ignored in one of the harshest environments a mechanical system can face. Salt air doesn’t take days off. Neither does the heat. While homeowners in Atlanta or Chicago are worrying about ice and freeze cycles, Miami homeowners are dealing with corrosive ocean air working on springs and cables 365 days a year, plus an opener motor running in ambient temperatures that routinely hit 90°F before noon. After 18 years and thousands of service calls across Miami, James Johnson has seen the same preventable failures over and over. This checklist is built to stop them before they start.
Quick Answer
A Miami garage door maintenance checklist should focus primarily on salt-air corrosion control, lubricant selection appropriate for high humidity, and post-storm hardware inspections — not the generic spring/fall schedule written for four-season climates. At minimum, Miami homeowners should lubricate hardware every three months with a silicone- or lithium-based lubricant (not WD-40), visually inspect springs and cables for rust monthly, and schedule a full professional inspection — or explore Seasonal Garage Door Care for Miami: Year-Round Homeowner’s Guide — once per year before hurricane season begins in June.
Table of Contents
- Why Miami’s Climate Makes Garage Door Maintenance Different
- Month-by-Month Maintenance Schedule for Miami’s Wet and Dry Seasons
- The Right Lubricants for Miami’s Humidity — and What to Avoid
- How to Spot Early Salt-Air Corrosion on Springs and Cables
- Hurricane and Tropical Storm Inspection Checklist
- What You Can Safely Check Yourself vs. What Requires a Technician
- Common Mistakes to Avoid
- When to Call a Professional
- Frequently Asked Questions
- The Bottom Line
Why Miami’s Climate Makes Garage Door Maintenance Different
Every maintenance guide you find online is written for a temperate climate with four distinct seasons. Miami doesn’t have four seasons — it has a wet season and a dry season, sustained high humidity year-round, and proximity to saltwater that accelerates metal corrosion at a rate most homeowners dramatically underestimate.
Here’s the problem with following generic advice: a spring or cable that would last 10,000 cycles in Denver might show early corrosion signs after half that in a Miami neighborhood like Coconut Grove or Surfside, where afternoon ocean breezes carry salt particles directly onto your garage hardware. That corrosion isn’t just cosmetic. It weakens the metal’s tensile strength, and a spring that’s been corroding quietly for 18 months can snap without warning — usually when you’re running late in the morning.
The other Miami-specific factor is heat load on your opener motor. Garage interiors in South Florida regularly hit 100–110°F in summer. LiftMaster, Chamberlain, Genie, and most other opener manufacturers rate their motors for standard operating temperatures, not sustained extreme heat. Running a motor daily in those conditions without attention to lubrication and ventilation shortens its service life measurably.
Humidity compounds everything. It accelerates rust on raw metal surfaces, degrades certain lubricants faster than they degrade in dry climates, and causes wood door panels (still common on older homes in Coral Gables and the Roads neighborhood) to swell, warp, and put uneven stress on springs and rollers.
The maintenance schedule and inspection priorities in this guide are calibrated for those Miami-specific realities — not repackaged from a guide written for homeowners in Minnesota.
Month-by-Month Maintenance Schedule for Miami’s Wet and Dry Seasons
Rather than “do this in spring and this in fall,” here’s a schedule built around Miami’s actual climate calendar — the dry season (roughly November through April) and the wet season (May through October, with peak hurricane risk June through November).
Dry Season Maintenance (November – April)
The dry season is your window for thorough hardware work. Lower humidity means lubricants penetrate and set better, and you can spot surface rust before seasonal rains accelerate it.
- November: Full visual inspection of all springs, cables, rollers, and tracks. This is your post-hurricane-season baseline check. Look for any storm-related stress, bent tracks, or hardware that shifted during high winds. Lubricate all moving parts with a lithium-based or silicone lubricant.
- December – January: Test the door balance. Disconnect the opener and manually lift the door to the halfway point — it should stay in place without assistance. If it drops or shoots up, the spring tension needs adjustment. Check the bottom weatherstrip seal for cracking; Miami’s UV exposure degrades rubber seals faster than most climates.
- February: Inspect the opener’s safety reversal system. Place a 2×4 flat on the ground in the door’s path and close it — the door must reverse on contact. Test the photo-eye sensors for proper alignment. Clean the sensor lenses with a dry cloth; Miami dust and spider webs are frequent culprits in sensor failures we see on LiftMaster and Chamberlain units.
- March – April: Pre-hurricane-season preparation begins. This is the time to schedule your professional annual inspection before June 1. Tighten all hardware bolts and brackets — vibration over thousands of cycles loosens them gradually. Check door panels for dents, cracks, or delamination. If you have a Clopay, Amarr, or Wayne Dalton steel door, look at the bottom corners where the panel meets the frame for early rust bubbling.
Wet Season Maintenance (May – October)
During wet season, the emphasis shifts from detailed repair work to monitoring and protection. Heavy rains, higher humidity, and storm risk make this your vigilance period.
- May: Apply a fresh coat of lithium grease to springs and a silicone spray to rollers and hinges before humidity peaks. Inspect the weatherstripping on all four sides of the door and replace anything that’s torn or compressed flat — a compromised seal lets moisture into your garage, which directly accelerates interior hardware corrosion.
- June – September: After any named tropical storm or hurricane, run the post-storm checklist (see the dedicated section below) before operating the door. Monthly visual checks on springs and cables — look specifically for new rust streaks or discoloration. If you see orange-brown streaking on a spring coil that wasn’t there last month, note it and monitor closely.
- October: End-of-hurricane-season inspection. Lubricate all hardware again. Check the opener’s battery backup if your unit has one (common on newer LiftMaster and Chamberlain openers) — batteries degrade faster in heat and may need replacement annually in Miami conditions.
The Right Lubricants for Miami’s Humidity — and What to Avoid
This is the section most homeowners skip — and it’s probably the single most impactful thing you can get right. Using the wrong lubricant in Miami’s environment doesn’t just fail to help; it actively makes corrosion worse.
What NOT to Use
WD-40 is the wrong product for garage door hardware. We know it’s in every garage in Miami, and we know it feels like the obvious answer. But WD-40 is a water-displacement solvent, not a long-term lubricant. It evaporates quickly, leaves behind a residue that attracts dust and debris, and provides essentially no protection against the salt-air corrosion that’s actually attacking your springs and cables. In high-humidity environments, it can trap moisture against metal surfaces rather than repelling it. We see this mistake constantly on service calls in Doral, Kendall, and Hialeah — a homeowner has been spraying WD-40 on their springs for years thinking they’re maintaining them, and the springs are quietly corroding underneath that gummy residue.
Also avoid: standard motor oil (too heavy, attracts grime), cooking spray (short-lived and gummy), and any petroleum-based grease on plastic components like nylon rollers — it degrades the plastic over time.
What TO Use
- Springs: A white lithium grease spray — applied directly to the coils. Lithium grease creates a water-resistant barrier that stays in place longer than lighter sprays, which matters when Miami humidity is working against you daily. Apply until the coils look lightly coated, not dripping.
- Rollers (metal): White lithium grease or a dedicated garage door lubricant spray. Focus on the roller shaft and the inside of the roller housing where it contacts the track.
- Rollers (nylon): Silicone-based spray only. Do not use lithium grease on nylon rollers — it degrades the material.
- Hinges: White lithium grease or silicone spray on the hinge pins and pivot points.
- Tracks: Do not lubricate the tracks themselves. Clean them with a damp cloth to remove dirt and debris, but the rollers should roll in a clean, dry track. Lubricating the tracks causes the rollers to slip.
- Opener chain or belt: If your Genie, Craftsman, or Raynor opener uses a chain drive, apply white lithium grease to the chain. Belt-drive openers (common on newer LiftMaster and Chamberlain units) generally don’t require lubrication — check your specific model’s manual.
- Lock cylinder: Graphite powder, not any oil-based product. Oil in a lock cylinder gums up the mechanism over time.
Lubrication frequency in Miami: every three months during normal operation, or immediately after any heavy rainfall event where water entered the garage or soaked the exterior hardware.
How to Spot Early Salt-Air Corrosion on Springs and Cables
Salt-air corrosion is a slow process that gives you warning signs before it reaches the failure point — if you know what to look for. The problem is that most homeowners don’t look at their springs and cables closely enough to catch those signs early. Here’s what to watch for.
Torsion Springs (the horizontal spring above the door)
- Surface rust (early stage): A light orange-brown discoloration on the spring coils. At this stage, the spring still has structural integrity but needs immediate attention — clean the surface rust with fine steel wool, apply lithium grease, and increase your inspection frequency to monthly.
- Pitting corrosion (mid stage): Small divots or pock marks on the coil surface, visible when you look closely with a flashlight. This means the corrosion has penetrated beyond the surface. A spring showing pitting should be replaced, not lubricated through — the structural integrity is compromised.
- Rust streaking on the wall or floor below the spring: If you see orange streaks running down the wall behind your door, or rust-colored dust on the floor beneath the spring, corrosion is actively shedding. This is an urgent replacement situation.
- Coil separation or gaps: A torsion spring under proper tension has evenly spaced coils. A visible gap between coils — especially if it appeared suddenly — can indicate a partial break. Do not operate the door if you see this.
Lift Cables
- Fraying: Look for individual wire strands that have separated from the cable bundle, particularly at the bottom bracket attachment point and at the drum at the top of the door. Even one or two frayed strands are a replacement indicator — cables in Miami’s environment don’t recover from fraying, they progress to failure.
- Rust-colored discoloration along the cable length: Similar to spring corrosion, surface rust on cables appears as orange-brown staining. Cables are under extreme tension and have less margin for structural degradation than springs — replace at first sign of significant rust.
- Kinking or uneven winding on the drum: If the cable isn’t winding evenly around the drum, it will wear unevenly and fail prematurely. This is often a sign of a drum or cable drum bracket issue, not just the cable itself.
In Miami neighborhoods like North Miami Beach and Aventura, where homes sit within a mile of the ocean, we recommend monthly cable and spring checks — not seasonal ones. The corrosion timeline is simply faster that close to saltwater.
Hurricane and Tropical Storm Inspection Checklist
After any named storm passes through Miami, run this inspection before you operate your garage door — even if it looks fine from the outside. Storm damage to garage door systems is often internal and not immediately visible.
- Visual exterior inspection first: Before opening the door, walk around the outside and look for dents in panels, debris wedged under or along the door, and any visible bending of the door frame or track. Operating a door with a bent track can cause serious secondary damage.
- Check the tracks: Look at both vertical tracks (running up the sides of the door) and the horizontal tracks (extending back into the garage). They should be parallel, plumb, and free of dents. A dented track can cause the rollers to bind or jump, which can damage rollers, cables, and the door panels themselves.
- Inspect the bottom bracket and cables: The bottom bracket — the metal fitting at the lower corner of the door where the cable attaches — takes significant stress during high winds. Look for cracks, bending, or any sign the bracket has pulled away from the door.
- Check the weatherstripping on all four sides: Storm winds frequently tear or dislodge weatherstripping. A missing bottom seal allows water intrusion that directly accelerates floor-level hardware rust.
- Test manual operation before using the opener: Disconnect the opener and manually lift the door a few feet. If it feels heavier than usual, catches, or moves unevenly, stop and call a technician before using the automatic opener. Forcing an opener against a mechanically compromised door can burn out the motor.
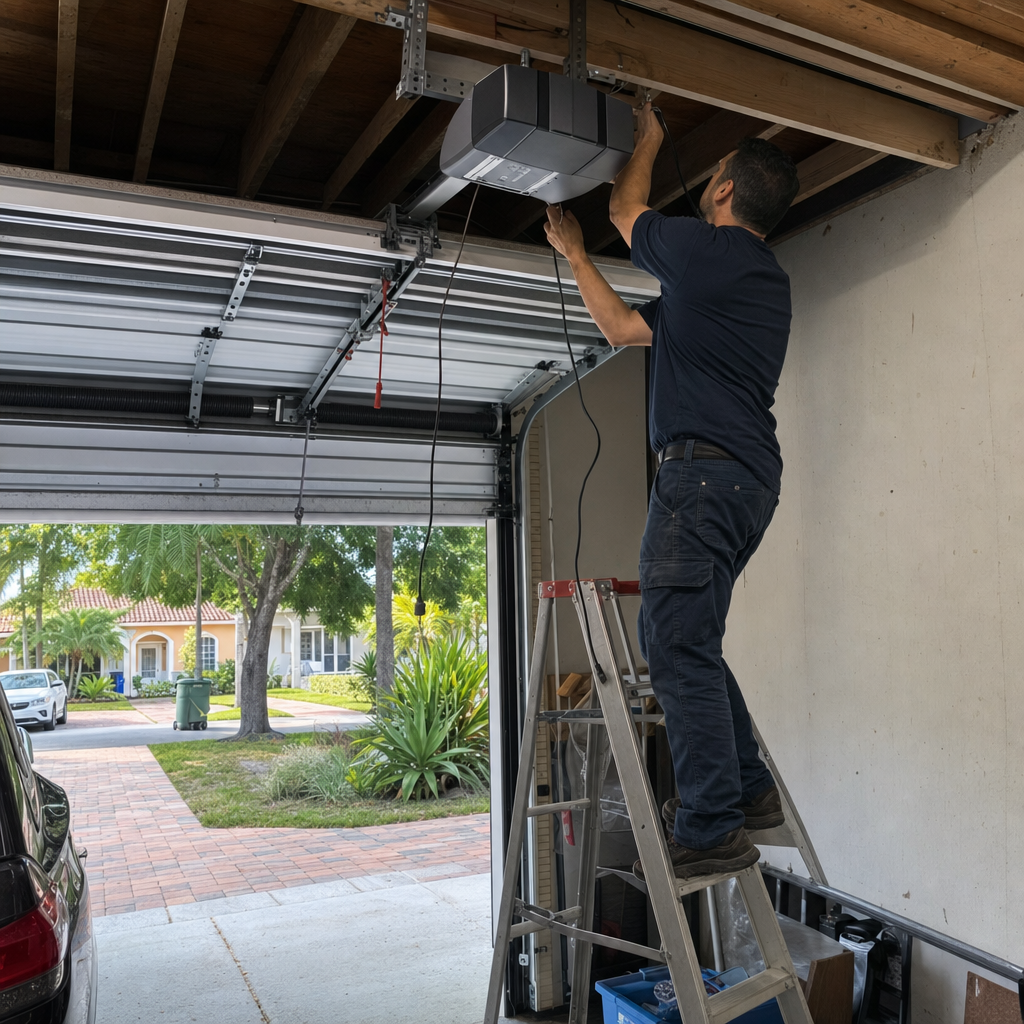
- Inspect the opener mounting hardware: The opener is mounted to the ceiling with a series of brackets and straps. High winds and pressure changes can loosen these fasteners. Check all visible bolts and brackets for tightness.
- Test the safety reversal system after the storm: The 2×4 test described in the monthly checklist — do it again after any significant storm. Sensor alignment can shift from structural vibration during high winds.
- Document any new damage before filing a homeowner’s insurance claim: If you’re in Miami and your door sustained damage during a named hurricane, photograph everything before repairs begin. Florida homeowner’s insurance policies increasingly scrutinize garage door claims, and documentation of pre-repair condition is important.
What You Can Safely Check Yourself vs. What Requires a Technician
Being clear about this boundary isn’t just about liability — it’s about safety. Garage door springs operate under hundreds of pounds of tension. A torsion spring failure is violent and can cause serious injury. Here’s an honest breakdown of where the line is.
Safe for Homeowners to Do
- Visual inspection of springs, cables, tracks, rollers, and panels — looking without touching the spring hardware
- Lubricating rollers, hinges, and the top of the torsion spring coils with a spray lubricant (you’re applying lubricant, not adjusting tension)
- Testing door balance (lift manually to halfway and observe) and reversal safety sensors
- Tightening loose nuts and bolts on track brackets and door hinges with a socket wrench
- Cleaning tracks with a rag and mild cleaner
- Replacing weatherstripping on the bottom of the door (most bottom seals slide into a retainer and don’t require special tools)
- Cleaning and realigning photo-eye sensors
- Replacing opener batteries (remote, keypad, and backup battery in the opener unit)
- Programming remotes and keypads
Requires a Professional Technician
- Any spring adjustment or replacement: Torsion springs are under extreme tension and must be adjusted with calibrated winding bars. This is not a YouTube video project — it’s one of the most common sources of serious garage door injuries.
- Cable replacement or re-routing: Cables run through drums and bottom brackets under high tension. Replacing them requires releasing spring tension first, which loops back to requiring professional spring handling.
- Track realignment after storm damage: Bending or adjusting steel tracks requires knowing the correct geometry for your specific door’s weight and size. An improperly aligned track creates ongoing problems.
- Opener motor or logic board replacement: LiftMaster, Chamberlain, Genie, and other opener brands have model-specific components and programming sequences. Incorrect installation can void warranties and create safety system failures.
- Any repair where you’re unsure: If you start a task and something doesn’t look right, stop. The cost of a professional visit is always less than the cost of secondary damage from a repair gone wrong.
Common Mistakes to Avoid
- Using WD-40 as a lubricant on springs and cables. As covered above, WD-40 is not a lubricant for these applications — it evaporates quickly and can trap moisture. Switch to white lithium grease and you’ll immediately see better results and longer hardware life.
- Ignoring small rust spots because the door is still working. A torsion spring in Miami showing surface rust in January can be a failed spring by May when humidity peaks again. Early-stage corrosion is the easiest and cheapest point to intervene — waiting for complete failure means emergency service and typically a higher parts cost.
- Operating the door after a storm without running the inspection checklist first. We’ve seen track damage from hurricane debris that wasn’t visible from outside but was obvious the moment someone ran the inspection. Forcing an opener through a bent track can destroy rollers, damage door panels, and burn out the motor in a single cycle.
- Lubricating the tracks instead of the rollers. This is one of the most common DIY mistakes we see in Miami. Lubricant on the track surface causes rollers to slip rather than roll, which creates uneven wear and can cause the door to jump the track.
- Skipping the annual professional inspection because the door “seems fine.” Spring tension loss, early cable fraying, and motor wear all happen gradually and invisibly. A door that seems fine in February can fail in August — the hottest, most humid, highest-use period of the year in Miami. An annual inspection catches these progressions before they become failures.
- Adjusting spring tension yourself based on online tutorials. This mistake is especially common among handy homeowners who’ve successfully handled other mechanical repairs. Garage door spring tension is not analogous to other home repair tasks — the energy stored in a wound torsion spring can cause fractures and lacerations. James handles spring work personally on every Sterling service call precisely because it demands experienced hands, not first-timers following a video.
- Replacing only one spring when two are installed. Most residential garage doors in Miami have two torsion springs of matched tension. When one breaks, both springs have typically reached the same point in their service life. Replacing only the broken one leaves you with a new spring and an aged, stressed spring that will likely fail within months — usually at the least convenient moment.
When to Call a Professional
Call a technician immediately if you see any of the following: a broken or visibly cracked torsion spring; a cable that has come off its drum or shows fraying; the door has stopped mid-travel and won’t respond to the opener or manual operation; the door is moving visibly unevenly — one side rising faster than the other; you hear grinding, scraping, or a sharp bang during operation; or you’ve run the post-storm checklist and found bent tracks or damaged bottom brackets. These are not situations where temporary workarounds make sense. A compromised spring or cable can fail completely on the next cycle, and the force involved is significant.
For anything that falls into the “requires a professional” category above, or if you completed a DIY check and something didn’t look right but you’re not sure what it is, Sterling Garage Door Service North Miami offers free estimates in Miami — call (754) 666-7745 and James will give you a straight answer about what you’re looking at and what it takes to fix it.
Frequently Asked Questions
How often should I lubricate my garage door in Miami?
Every three months is the right frequency for Miami homeowners — that’s twice as often as most generic guides recommend, and it’s calibrated for the combination of salt air and humidity that degrades lubricant barriers faster here than in drier climates. If your garage is close to the ocean or a canal (Brickell, Key Biscayne, Miami Beach), consider moving to a 6-to-8-week cycle for springs and cables specifically. Call (754) 666-7745 if you want James to assess your specific situation and give you a tailored schedule.
What’s the best lubricant for garage door springs in Miami’s humidity?
White lithium grease in a spray can is the right answer for torsion springs in Miami. It creates a water-resistant film that stays in place longer than light sprays and doesn’t attract the road dust and debris that petroleum-based products do. Apply it directly to the coils — not WD-40, not motor oil, not cooking spray. For nylon rollers and plastic components, switch to silicone spray. Never cross these two products.
How do I know if my garage door springs are corroding in Miami’s salt air?
Look for orange-brown discoloration on the spring coils — that’s surface rust, and it’s the earliest visible stage of salt-air corrosion. If you see small pits or divots on the coil surface when you look closely with a flashlight, the corrosion has penetrated deeper and the spring needs replacement. Rust streaking on the wall or ceiling near the spring, or rust-colored dust on the floor beneath it, means active corrosion shedding and warrants an urgent call to a technician. Don’t wait on this one — call (754) 666-7745 for a free assessment.
Do I need a garage door inspection after a tropical storm or hurricane in Miami?
Yes, every time — even if the door looks undamaged from the outside. Storm debris can dent tracks in ways that aren’t visible until you run a close inspection, and structural vibration from high winds can loosen mounting hardware and shift sensor alignment. The post-storm checklist in this guide covers the full sequence. If you find anything that looks off, stop and call a technician before using the automatic opener. Operating an opener against a compromised mechanical system can turn a minor repair into a major one.
How much does a garage door spring replacement cost in Miami?
Spring replacement in Miami typically runs between $180 and $320 for a standard residential torsion spring setup, depending on the spring size and whether one or both springs need replacement. As noted in this guide, if one spring has broken, replacing both at the same time almost always makes sense — the labor is the same and you avoid a second service call when the matched spring fails shortly after. Call (754) 666-7745 for a free estimate specific to your door’s configuration.
Can I inspect my own Garage Door Repair in Miami Beach or do I need a technician?
You can and should do monthly visual inspections yourself — look at springs, cables, rollers, and tracks, test the balance manually, and test the safety reversal system. What you should never do yourself is adjust spring tension, replace cables, or attempt to repair a bent track. The visual inspection is free, safe, and gives you early warning. The mechanical work requires calibrated tools and experience working with components under high tension. When the inspection reveals something that needs hands-on attention, that’s the moment to call our Garage Door Repair services.
The Bottom Line
Miami garage doors fail early for two reasons: salt-air corrosion that goes unnoticed until a spring snaps, and heat-stressed hardware that never gets the lubrication it needs. The fixes are genuinely not complicated — the right lubricant on the right schedule, a monthly visual check that takes five minutes, and a professional inspection once a year before hurricane season. Follow the month-by-month schedule in this guide, use white lithium grease instead of WD-40, run the post-storm checklist after every named storm, and you’ll get significantly more life out of every moving part on your door. For more guides & resources, explore our full library. When something needs professional attention, call before it becomes an emergency.
If you have questions about your door’s condition, or you’d like to book the annual inspection that forms the foundation of this checklist, Garage Door Opener in Miami Beach and full-service garage door maintenance across Miami are part of what James handles personally. Call (754) 666-7745 — estimates are free, and you’ll talk to someone who has been doing this work in Miami for 18 years.
For homeowners considering a new installation alongside maintenance planning, Garage Door Installation in Miami Beach is also available through Sterling — same owner, same hands, same standard of work.
Written by James Johnson, Owner & Lead Technician at Sterling Garage Door Service North Miami, serving Miami since 2008. 4.9 stars across 432 verified reviews.